
A whole-home energy monitor never lowers an electric bill on its own. Split-core current transformers (CTs) measure where amps flow and when loads peak; actual dollar savings happen only when that data reveals a specific fix—such as shifting an EV charger off a peak time-of-use (TOU) window, catching a stuck well pump or basement dehumidifier, or stopping auxiliary electric heat strips from running unnecessarily.
Before buying hardware that goes inside your breaker box, exhaust the safest, zero-cost data source first: your utility’s smart-meter interval portal and 120-volt plug-in energy meters. Move to an in-panel CT monitor only when you need circuit-by-circuit visibility on hardwired 240-volt equipment, and always budget for a licensed electrician to install it.
This guide was fact-checked on October 18, 2026 against U.S. Department of Energy Green Button documentation, Emporia’s Vue 3 installation manual, Sense’s installation and hardware-lifecycle announcements, and SPAN’s owner documentation.
Compare the four tiers of home electricity monitoring
Matching the measurement tool to the exact billing question prevents both overspending and unnecessary work inside an energized load center:
| Monitoring Tier | Hardware & Typical Sensor Scope | What It Can Identify | What It Cannot Identify | Installation & Safety Boundary |
|---|---|---|---|---|
1. Utility Interval Portal (DOE Green Button) | Utility revenue smart meter ($0 added hardware; 15-min or 60-min kWh exports) | Overnight baseload creep, TOU peak vs. off-peak usage, seasonal heating/cooling shifts | Individual branch circuits or which specific appliance caused a spike | DIY Safe: Web portal download; zero electrical work |
| 2. Corded Plug-In Meter / Energy Smart Plug | Single 120V/15A outlet pass-through meter (UL-listed for rated load) | Dehumidifiers, second garage refrigerators, space heaters, home-lab/PC racks | Hardwired 240V equipment (HVAC, EVSE, water heater, range, subpanels) | DIY Safe: Plug into standard 120V receptacle within rated amperage |
3. In-Panel Multi-Circuit CT Monitor (Emporia Vue 3) | 2× 200A main CTs on service feeders + up to 16× 50A branch CTs on selected circuits | Exact kW and kWh on dedicated 240V/120V branch circuits plus net solar/grid flow | Individual outlets sharing a single multi-receptacle branch circuit | Licensed Electrician Required: Requires removing panel deadfront near live service lugs |
4. Integrated Smart Load Center (SPAN Panel models) | Full replacement load center with built-in per-breaker metering and relay control | Every breaker in the panel plus automated load shedding during battery backup | Not a retrofit sensor kit; model-specific breaker/bus limits apply | Permitted Electrical Project: Full panel swap coordinated with utility & AHJ |
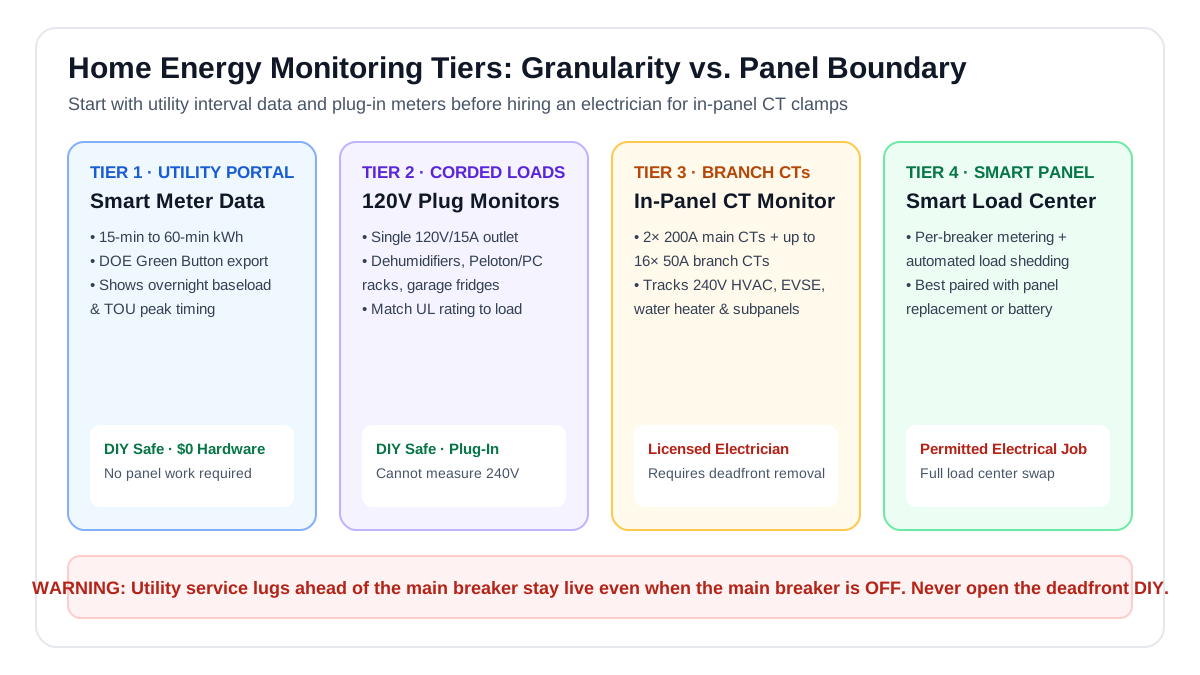 Progress from left to right only when the simpler tier cannot answer your billing question. Any device installed behind the panel deadfront requires a licensed electrician.
Start with utility interval data before buying hardware
Most U.S. electric utilities with advanced metering infrastructure (AMI) let homeowners view or export 15-minute or hourly consumption files. Under the U.S. Department of Energy’s Green Button standard (Download My Data and Connect My Data), you can inspect a full year of interval usage in a spreadsheet without buying a single sensor.
Four high-bill questions you can answer directly from utility interval data:
- What is the house’s true 3:00 a.m. baseload? Look at 2:00 a.m. to 5:00 a.m. during a mild spring or autumn night when HVAC and EV charging are off. That steady floor represents always-on refrigerators, networking gear, radon/circulation fans, dehumidifiers, and standby electronics.
- Is EV charging or water heating spilling into peak TOU hours? If your tariff charges more between 4:00 p.m. and 9:00 p.m., interval bars immediately show whether a misconfigured timer is starting high-draw loads before off-peak rates begin.
- How much of a summer or winter bill spike is weather-driven? Comparing degree-days against daily kWh separates normal heat-pump or AC load from a stuck relay.
- Did a schedule change actually cut kWh or merely shift it? Compare seven-day intervals before and after adjusting a thermostat setback or pool-pump timer.
How split-core CT clamps work—and why the panel deadfront is a strict DIY boundary
A current transformer (CT) is an inductive sensor ring that clips around a single insulated wire to measure alternating current without cutting the conductor. To calculate real power (watts) and energy (kilowatt-hours) rather than apparent current alone, a whole-home monitor pairs those CT clamps with a voltage-sensing reference harness wired to circuit breakers inside the load center.
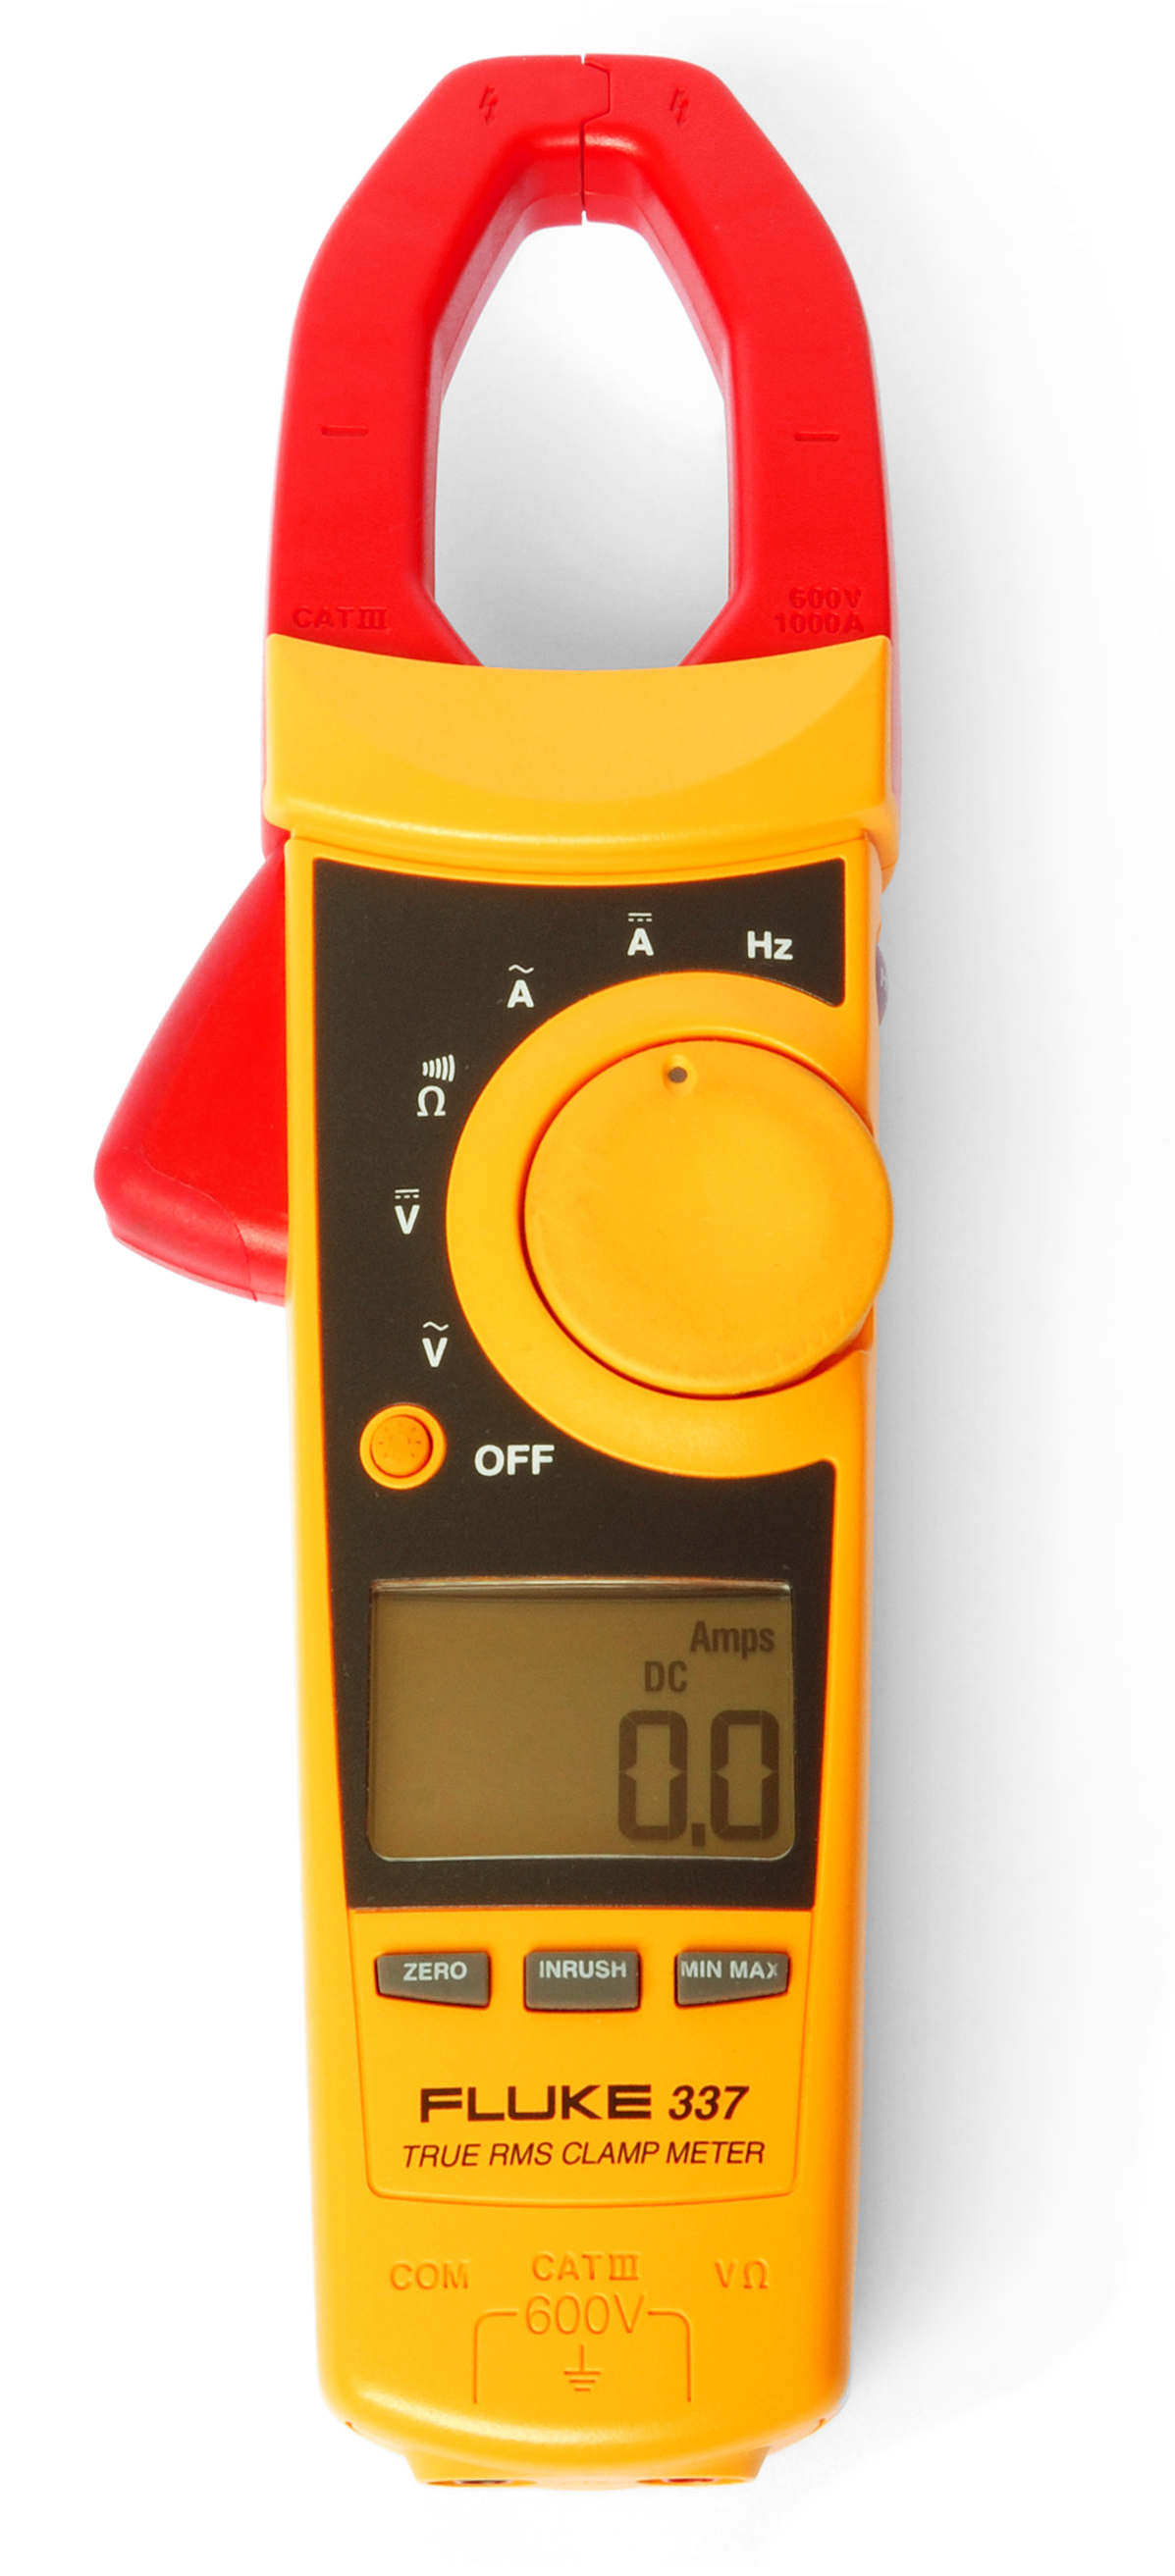 A handheld clamp meter (Fluke 337) demonstrating the inductive split-core sensing mechanism used to measure AC current around an insulated conductor. Unlike portable test instruments, whole-home energy monitors install fixed CT sensors permanently inside the panel—work that requires removing the deadfront near energized utility lugs and must be performed by a licensed electrician. Photo: Harke / Wikimedia Commons (Public Domain).
Because split-core CTs snap around insulated wire jackets, online forums sometimes treat in-panel monitors as a casual weekend DIY project. That advice ignores how a residential main breaker panel is wired:
- Switching a home’s main circuit breaker to
OFFde-energizes the downstream branch busbars, but the incoming utility service entrance conductors and main terminal lugs ahead of the main breaker remain live at full utility fault current unless the utility disconnects the meter or an upstream exterior main disconnect is opened and verified. - Removing the inner metal panel cover (the deadfront) exposes those live service lugs right where the two 200-amp main CTs must be clamped.
- Both Emporia and Sense explicitly warn against unqualified installation. The Emporia Vue 3 Installation Guide states that installation must be performed by a skilled person, such as a licensed electrician, in accordance with local electrical codes. The Sense Installation Guide likewise mandates professional installation and warns that main service lugs remain dangerously energized when the main breaker is off.
Hard safety rule: Never unscrew or remove the panel deadfront yourself to check physical space, route sensor leads, or clip on CTs. Hire a licensed electrician who can verify enclosure fill, breaker compatibility for the voltage harness, and safe CT routing.
Direct branch-circuit CTs vs. algorithmic device detection (and the 2026 Sense hardware update)
Shoppers researching whole-home monitors usually encounter two technical philosophies: direct per-circuit CT measurement and machine-learning load disaggregation.
1. Direct branch-circuit CTs (such as Emporia Vue 3)
Systems like the Emporia Vue 3 combine two 200-amp main CTs on the service feeders with up to 16 individual 50-amp branch-circuit CTs. Every conductor with a dedicated clamp reports measured power directly.
- Best for: Dedicated 240-volt and 120-volt loads—such as a heat pump condenser, air handler with electric auxiliary heat strips, electric water heater, EV charger, well pump, pool pump, or kitchen subpanel.
- Physical limit: A branch CT measures the entire circuit, not individual wall outlets on a shared general-lighting breaker. Additionally, tight older panels may not have physical room to route 16 branch CTs neatly without crowding conductors. Tell your electrician which 6 to 12 high-draw circuits actually matter to your bill rather than forcing every clamp into a crowded enclosure.
2. Algorithmic device detection (and why you must check Sense’s 2026 status)
Instead of clamping individual branch circuits, whole-home disaggregation monitors sample main-feeder voltage and current at high frequency and use machine-learning signatures to guess when individual motors or heating elements turn on.
Two documented limitations govern this category in 2026:
- Inference is not a complete inventory: As Sense’s own support documentation notes, algorithmic detection works best on distinct on/off motor and resistance signatures, takes weeks of training, and often struggles to separate variable-speed inverter heat pumps, modulating EV chargers, or electronics sharing similar power draws.
- Hardware discontinuation notice: In its official product-support update, Sense announced that it stopped selling consumer in-panel Sense Home Energy Monitor hardware as of December 31, 2025, shifting its business toward software embedded directly inside utility smart meters while continuing cloud support for existing installed units. If you see old-stock or secondhand Sense monitors on marketplaces in 2026, verify warranty terms, return policies, and long-term cloud dependency before paying an electrician to install one.
Turn circuit data into a verified bill reduction
Once your monitor or utility portal is running, use a disciplined five-step audit loop so you do not mistake a colorful app graph for money saved:
- Isolate one specific question: Target a concrete hypothesis—for example, “Are the 10 kW auxiliary heat strips on our heat pump energizing during mild 42°F mornings?” or “How many kWh per day does the basement dehumidifier draw in July?”
- Record a 7-to-14-day baseline: Log daily kWh and peak time-of-day windows alongside outdoor high/low temperatures.
- Make one controlled change: Adjust the thermostat’s auxiliary heat lockout setting, clean condenser coils, fix a leaking hot-water fixture, or set the dehumidifier humidistat from 40% to 50% RH.
- Compare weather-normalized periods: Check daily kWh across days with matching outdoor temperatures and occupancy.
- Price the change using your actual utility tariff:
Verified Annual Savings = (Verified kWh Eliminated × Applicable Tier/TOU Rate)
                        + (Verified kWh Shifted × [Peak Rate − Off-Peak Rate])
                        − Annual Cloud Subscription or Hardware Amortization
Never trust a marketing banner that promises a flat “10% to 20% electric bill reduction” just from installing a monitor. A tightly scheduled, well-maintained home may find zero wasted kWh, while a home with a malfunctioning well pressure tank or misconfigured heat-pump staging relay can uncover hundreds of dollars in avoidable runtime in the first week.
Pre-installation checklist for your electrician
Before scheduling an electrician to install an in-panel CT monitor, prepare these six items from outside the closed panel:
- Download 12 months of utility bills and Green Button interval data and write down your exact rate schedule name, tier thresholds, and TOU peak hours.
- Open the outer hinged panel door (leaving the metal deadfront screwed shut) and photograph the circuit directory and breaker layout so the electrician can see breaker types (standard, tandem, AFCI/GFCI) in advance.
- Rank your top 8 to 12 target circuits (HVAC condenser, air handler, water heater, EV charger, dryer, well/sump pump, subpanel feeder) so the electrician clamps the highest-value loads first.
- Test 2.4 GHz Wi-Fi signal strength immediately outside the closed metal panel door (or verify Ethernet port availability if using an Ethernet-capable monitor like the Emporia Vue 3).
- Check cloud and data-export policies: Confirm whether the monitor allows CSV data exports, whether any features require a recurring subscription, and whether you are using manufacturer-supported firmware (flashing third-party firmware onto an in-panel device can void its UL safety listing and warranty).
- Request a live load verification at commissioning: Have the electrician turn on one known heavy load (such as the electric dryer or EV charger) after closing the panel deadfront to confirm that CT directional arrows and phase assignments read positive wattage accurately.